21. think-cell Tools
This chapter explains how to use the think-cell Tools. By default, you can find most think-cell Tools on the think-cell tab of the PowerPoint ribbon, which enables quick access to frequently used features.

If you have a customized ribbon and want to reset the think-cell tab to its default state, select Insert > think-cell > Tools 


21.1 Align and match sizes
The align and same-size tools help you quickly arrange objects on a slide. Use the reference object for more control when you arrange objects.
21.1.1 Align and distribute objects
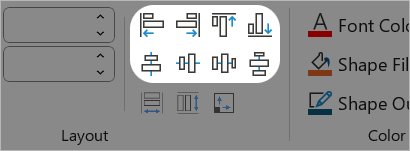
Align objects to each other or to the slide. To align objects, select the objects, then select think-cell > Layout > Align or Shape Format > Arrange > Align and select how you want to align them:
- Align Left, Align Center, or Align Right
- Align Top, Align Middle, or Align Bottom
- Distribute Horizontally or Distribute Vertically
Note the following options when aligning or distributing objects:
- If you select a single object, it aligns to the slide.
- If you select multiple objects, you can select an object as the reference object. The reference object has a red dot at its center. To set a reference object, hover over an object until you see a red dot, then select the object.
- When you align objects to a reference object, the reference object itself will not move.
If there are no think-cell elements in your selection you can still select think-cell > Layout > Align. The alignment behavior will be the same as the built-in PowerPoint function. To use a reference object and the alignment behavior of think-cell, you must have a think-cell element in your selection. To learn more, see 3.3.4 Reference object and 3.5.1 Align objects.
21.1.2 Match sizes of objects
Set multiple objects to the same width, height, or both. To match the size of objects, follow these steps:
- Select two or more objects.
- Set a selected object as the reference object. The reference object has a red dot at its center. To set a reference object, hover over an object until you see a red dot, then select the object.
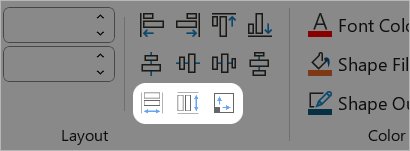
- Select think-cell > Layout and select Same Width


If there are no think-cell elements in your selection, you can still select Same Width
21.2 Send and save slides
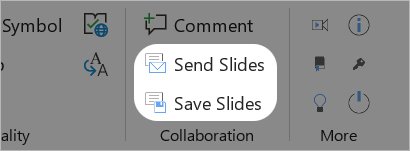
Send or save a selection of slides or a whole presentation. Combine your selected slides into a new PowerPoint presentation and share them easily.
Send slides
- Select think-cell > Collaboration > Send Slides

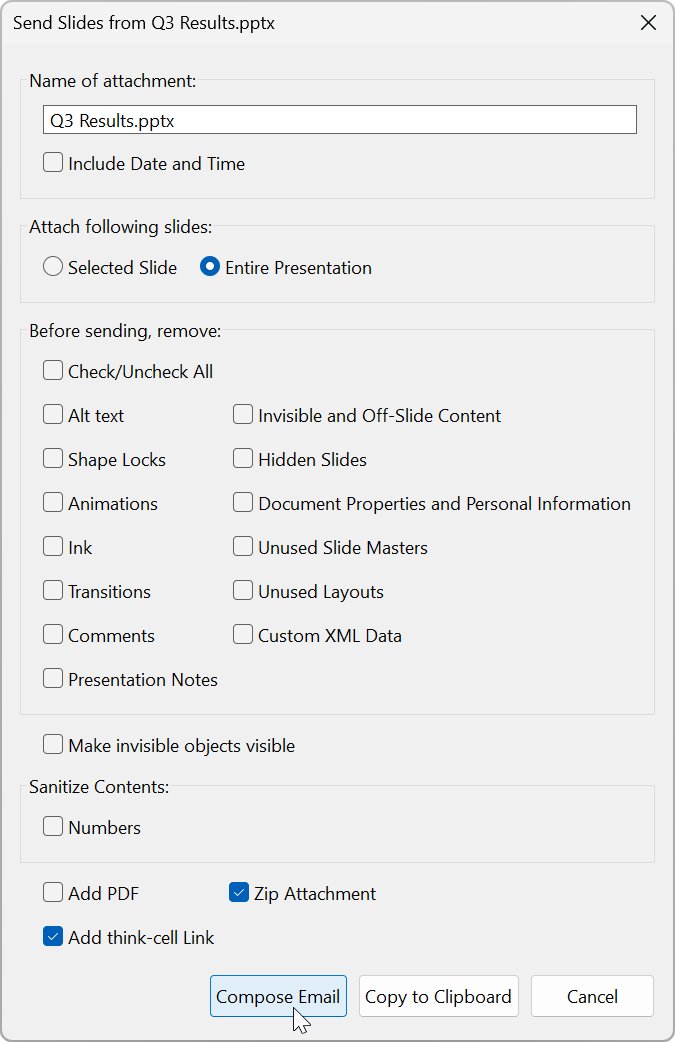
- To send specific slides, adjust your selection as you need while the dialog is open, then select Selected Slides. To send all slides, select Entire Presentation.
- To send your slides, select one of the following options:
- To create an email in your default email app, select Compose Email.
- To copy the new presentation you want to send to your clipboard without creating an email, select Copy to Clipboard—this is particularly useful if think-cell doesn't support your email or messenger app.
Save slides
- Select one or more slide thumbnails. Unlike with Send Slides, if you're using Windows, you need to select your slides first.
- Select think-cell > Collaboration > Save Slides

- Select Save.
After you save the slides, the new presentation opens for editing.
Choose options
When sending or saving slides, choose from the following options:
- Include Date and Time adds an ISO 8601 time stamp to the file name.
- Clean up the presentation before sending or saving. To learn more about cleaning up your presentation, see 21.3 Clean up and sanitize. Any clean up options that you select apply to the presentation that you save or send without affecting the original presentation.
When sending slides, choose from additional options:
- Add PDF attaches a
.pdfof the presentation to your email, in addition to a PowerPoint document.- To send the presentation in
.pdfformat only, in the file name, change the file extension to.pdf.
- To send the presentation in
- Zip Attachment attaches the files in a compressed
.zipfolder. - Add think-cell Link adds a link in the email to download think-cell. If the email recipient edits the presentation with think-cell, you don't need to reimport think-cell elements when you open the edited file. To learn more, see B.2 Reimporting think-cell elements from PowerPoint.
When saving slides, to save the presentation in .pdf format only, select Save as type > PDF on Windows or Format > PDF on Mac.
Send slides with Gmail
To send slides with Gmail by default, set up think-cell Send With Gmail in your computer settings. This option is only available if think-cell has been installed with administrator rights. To learn more, see 2.2.1 Installing think-cell.
Windows 10
- Select Start > Settings⚙ > Apps > Default Apps.
- Click on the current default app under Email.
- Select think-cell Send With Gmail.
Windows 11
- Select Start > Settings⚙ > Apps > Default Apps > Mail.
- Click on the current default app under MAILTO.
- Select think-cell Send With Gmail, then Set default.
21.3 Clean up and sanitize
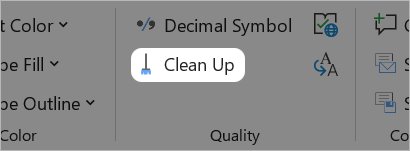
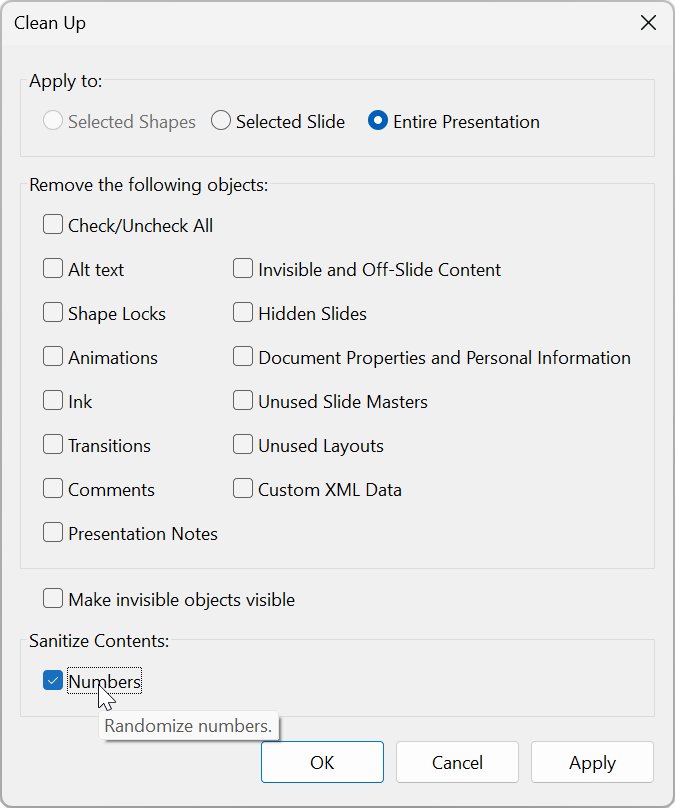
Remove sensitive information, comments, and other unwanted content to ensure your presentation is professional and secure. To clean up your presentation, select think-cell > Quality > Clean Up


|
Option |
Description |
|---|---|
|
Check/Uncheck All |
Selects or deselects all the options grouped under Remove the following objects. |
|
Alt text |
Removes alt text from objects. To learn more, see Microsoft Support. |
|
Shape Locks |
Unlocks any locked objects. To learn more, see Microsoft Support. |
|
Animations |
Removes animation effects, triggered animations, and motion paths. To learn more, see Microsoft Support. |
|
Ink |
Removes free-form ink objects. To learn more, see Microsoft Support. |
|
Transitions |
Removes transition effects. To learn more, see Microsoft Support. |
|
Comments |
Removes comments. To learn more, see Microsoft Support. |
|
Presentation Notes |
Removes content from the notes sections on slides. To learn more, see Microsoft Support. |
|
Invisible and Off-Slide Content |
Removes objects that are formatted as invisible or located outside the slide area. This option doesn't remove objects hidden behind other objects or objects that are invisible due to transparency or animation effects. To learn more, see Microsoft Support. |
|
Hidden Slides |
Removes hidden slides. To learn more, see Microsoft Support. |
|
Document Properties and Personal Information |
Removes metadata and personal information from the document properties. To learn more, see Microsoft Support. |
|
Unused Slide Masters |
Removes unused slide masters, including slide masters that are set to Preserve Master. To learn more, see Microsoft Support. |
|
Unused Layouts |
Removes unused slide layouts. To learn more, see Microsoft Support. |
|
Custom XML Data |
Removes custom XML data. To learn more, see Microsoft Learn. |
|
Make invisible objects visible |
Reveals hidden objects. Note that revealed objects may still be hidden behind other objects or located outside the slide area. To learn more, see Microsoft Support. |
|
Sanitize Contents: Numbers |
Replaces numbers with random numbers without affecting the shape and format of objects. |
To make changes, select Apply. To make changes and close the dialog, select OK.
⚠Caution: To remove invisible content, only use the Invisible and Off-Slide Content option of the think-cell Clean Up

21.4 Insert symbols
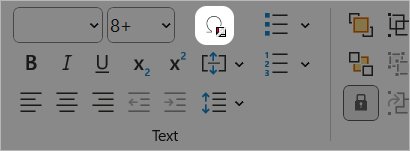
Access all the frequently used symbols at a glance. To open the Symbols dialog, select think-cell > Text > Insert Symbol 


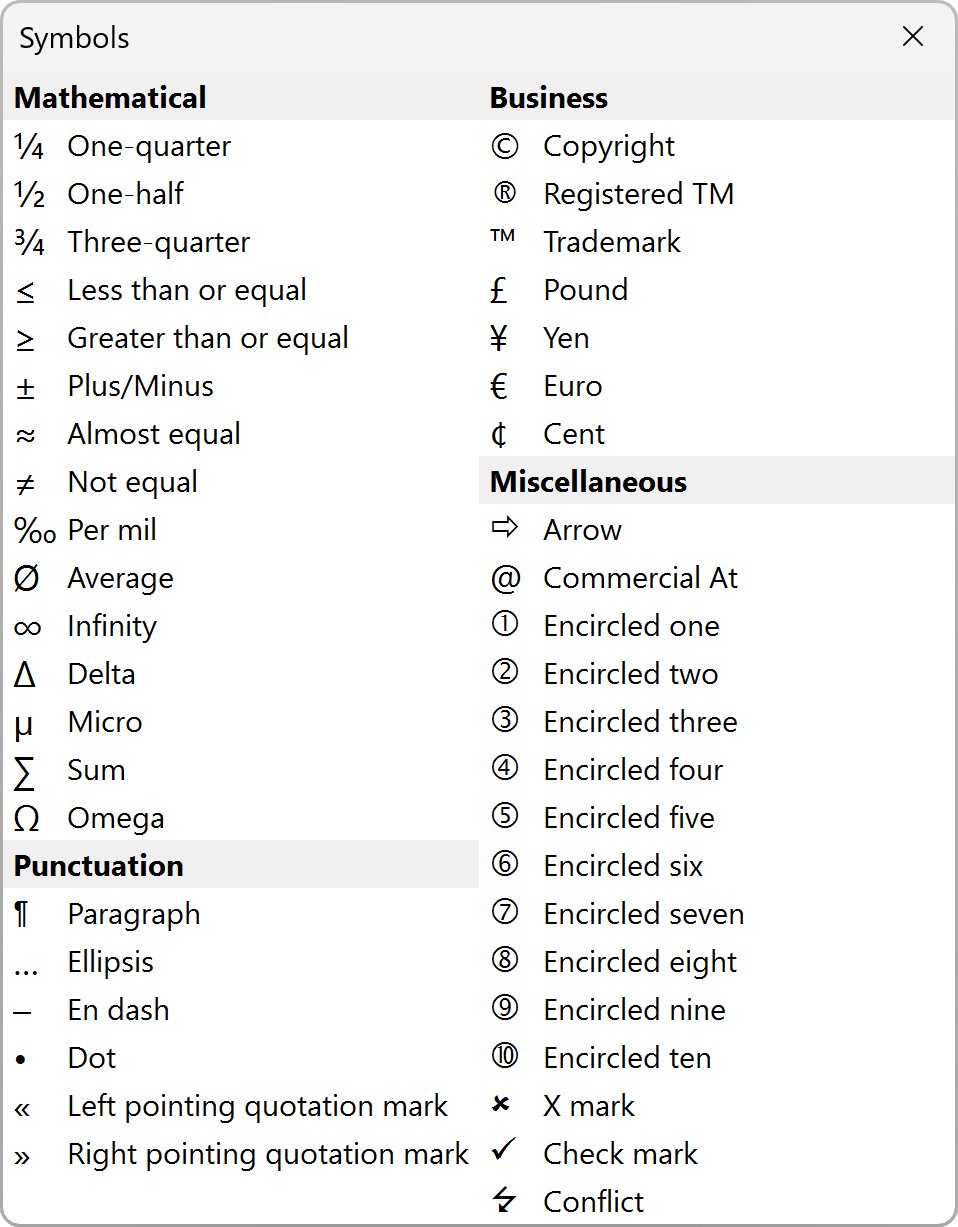
What think-cell improves: The PowerPoint Symbols dialog requires extensive navigation to find the symbol you want. Furthermore, you can't edit your presentation while the dialog is open.
21.5 Change the proofing language
Older PowerPoint versions
To change the proofing language, select some text or an object, then select think-cell > Quality > Set Proofing Language 

- All Text: Change the proofing language of the entire presentation without closing the dialog.
- Text on Slide: Change the proofing language of all the text on the current slide without closing the dialog.
- Default: Change the default proofing language for all new slides and presentations without closing the dialog.
- OK: Change the proofing language for your selected text only and close the dialog.
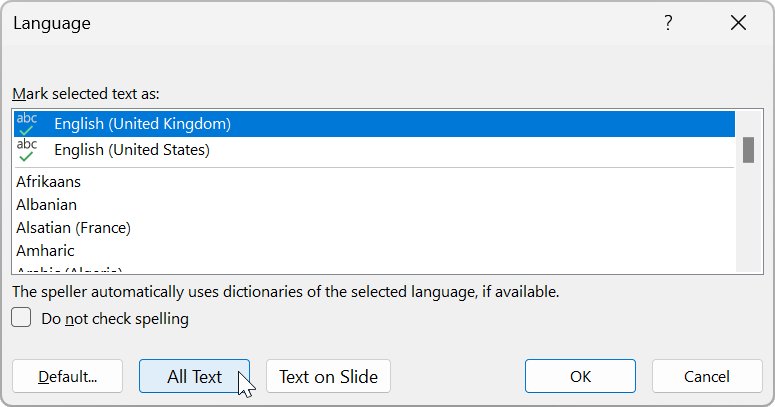
What think-cell improves: The PowerPoint Set Proofing Language dialog lacks the All Text and Text on Slide buttons.
Recent PowerPoint versions
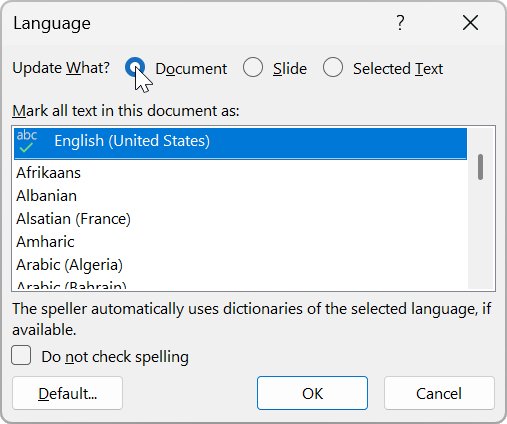
If you have a recent version of PowerPoint, think-cell doesn't modify the built-in Set Proofing Language dialog. To change the proofing language, select some text, an object, or a slide, then select think-cell > Quality > Set Proofing Language 

- Default: Change the default proofing language for all new slides and presentations without closing the dialog.
- OK: Apply your changes to your choice of document, slide, or selected text, and close the dialog.
21.6 Replace and resize fonts
Replace fonts on a particular text, slide, or in the entire presentation. To replace fonts, select think-cell > Quality > Replace Fonts 

- Replace: Choose to replace all fonts or a specific font.
- with: Select the new font you want to use.
- Change size by: Adjust the font size of the new font you want to use.
- Restrict to: Choose to apply the new font to all the text or only to particular text, such as text using Asian characters.
Choose to replace fonts on the selected slide or in the entire presentation. To replace fonts, select Replace. To close the dialog, select Close.
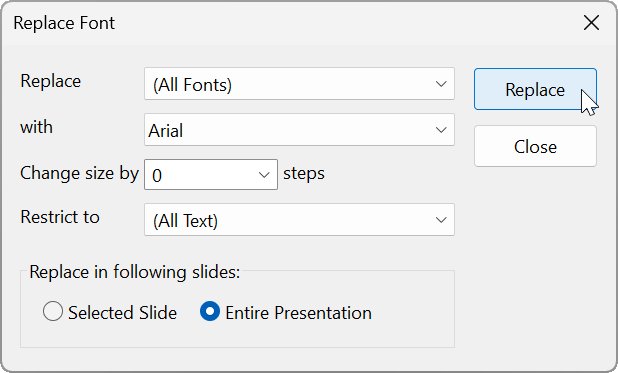
What think-cell improves: The PowerPoint Replace Fonts dialog replaces a selected font with another in the entire presentation. You can't replace fonts on a single slide, replace multiple fonts at the same time, or adjust the font size of the new font.
21.7 Switch decimal symbols
Switch between a comma and a point as the decimal symbol in think-cell elements. To switch the decimal symbol, select think-cell > Quality > Decimal Symbol 


Switch Decimal Symbol

21.8 Display file name or file path on slides
Displaying file names or paths on your slides can help you identify projects if you have specific documentation guidelines in your organization. You can add a text box to the slide master that always displays the file name or file path on all slides. You can also add a text box to the slide layout to only display the file name or path on slides that use the slide layout. The content of the text box updates automatically when the file name or path changes, as long as you open the file in PowerPoint with think-cell activated.
To add a text box that shows the file name or path, follow these steps:
- Switch to the Slide Master view by selecting View > Master > Slide Master.
- Select where you want to display the file name or path on. For example, to display the file name or path on the title slide of your presentation, select the title slide layout. To display the file name or path on every slide, select the slide master.
- Insert any element that can contain text, such as a text box. Enter some text and apply the text formatting you want. When you save the file, think-cell replaces the text you entered with the file name or path.
- Right-click the text box and select View Alt Text, or select Shape Format > Accessibility > Alt Text.
- In the Alt Text dialog, enter one of the following:
|
Alt Text |
What think-cell will display on slides |
|
|
The file name and extension. |
|
|
The file name and extension in capitals. |
|
|
The file name. |
|
|
The file name in capitals. |
|
|
The full file path and extension. |
|
|
The full file path and extension in capitals. |
- When you save the file, the file name or path appears on your slides.

